embeddist: List of Ethernet Shield Tutorials for IoT platform.
Tag Archives: Ethernet Shield
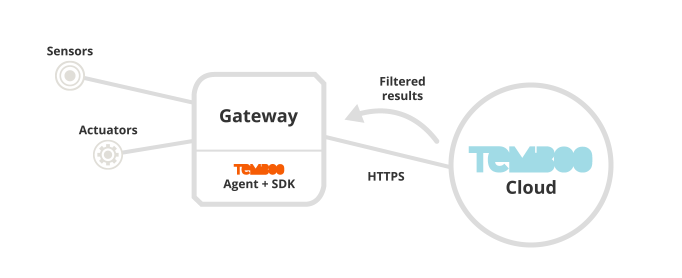
Connect Arduino to PubNub
See more at: Connect Arduino to PubNub in 2 Steps
PubNub is a provider of APIs that publishers as like Temboo.
Developers and Makers can use to implement messaging on cloud websites and SNS Apps by usin PubNub API.

The PubNub Data Stream Network powers thousands of apps, streaming 50 billion messages to 150 million devices a month..
This tutorial explains the steps to connect an Arduino to the PubNub Data Stream Network.
STEP 1: Connect the Arduino to a monitor, keyboard, mouse and ethernet cable.
STEP 2: You’ll need to sign up for a PubNub account. Once you sign up, you can get your unique PubNub keys in the PubNub Developer Portal. Be sure to input your unique publish/subscribe keys!
In this tutorial, Arduino Ethernet Shield is provides the Internet connectivity.

Note4 – Ethernet shield
ArduinoNote List-page
PREVIOUS: Note3 – Hello world
Ethernet Shield

Arduino Ethernet Shield는 Arduino Platform들을 Internet에 연결할 수 있는 Arduino Platform에 Plug-in하는 Module이다. Ethernet Shield에는 TCP/UDP Network stack을 처리할 수 있는 Ethernet Chip인 W5100 (WIZnet)가 onboard되어 있다. 이 칩과 제공되는 Ethernet Library를 통해 Arduino Platform이 Internet에 연결될수 있도록 합니다. 또한 이 Shield에서 RJ45 (Ethernet) Port를 통해 Ethernet Cable를 연결할 수 있으며, Micro-SD Slot을 지원하여 Network를 통한 File을 저장할 수 있도록 지원한다.
Serial Peripheral Interface
Arduino의 MCU와 Ethernet Shield의 W5100의 Connection을 위해 Serial Peripheral Interface(SPI)를 사용한다. SPI는 Synchronous Serial data protocol를 사용하며 Duplex를 지원하는 Bus Interface이다. 아래와 깉이 MISO, MOSI, SCK, SS 4개의 Line으로 구성돤다.
- SPI Signals
- MISO (Master In Slave Out) – The Slave line for sending data to the master
- MOSI (Master Out Slave In) – The Master line for sending data to the peripherals
- SCK (Serial Clock) – The clock pulses which synchronize data transmission generated by the master
- SS (Slave Select) – the pin on each device that the master can use to enable and disable specific devices.
- Connections
아래 표와 같이 Arduino Board마다 SPI port가 각각 다르며 ICSP에는 SPI Interface가 공통으로 존재합니다.Arduino Board MOSI MISO SCK Uno or Duemilanove 11 or ICSP-4 12 or ICSP-1 13 or ICSP-3 Mega1280 or Mega2560 51 or ICSP-4 50 or ICSP-1 52 or ICSP-3 Leonardo ICSP-4 ICSP-1 ICSP-3 Due ICSP-4 ICSP-1 ICSP-3 - ICSP Header

- ICSP Header
- Ethernet shield compatible (W5100 base)
- Seeedstudio

- DFROBOT

- e-gizmo

- Seeedstudio
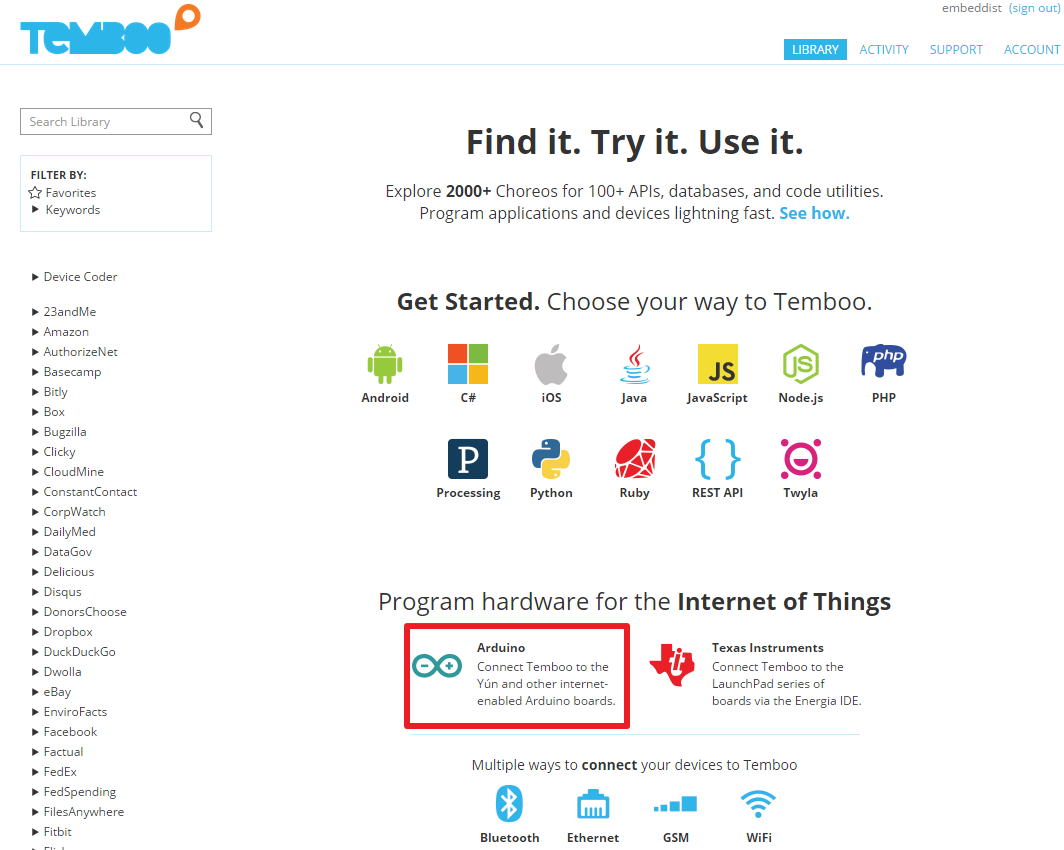
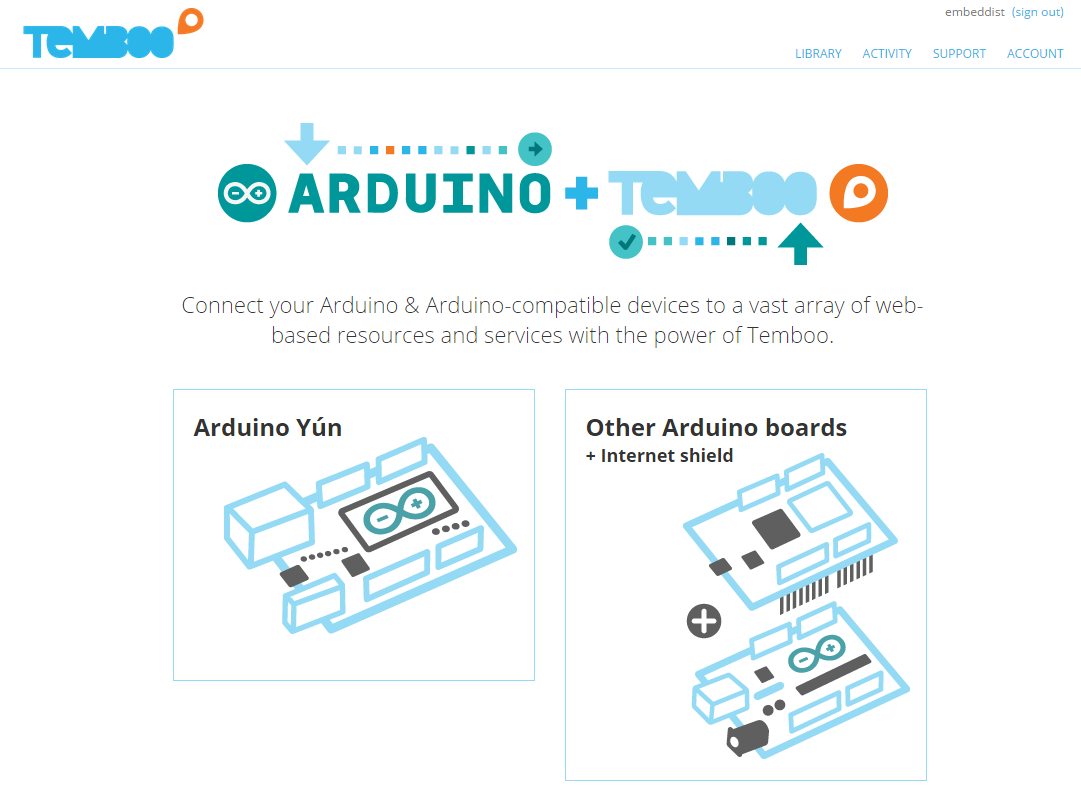
ARDUINO with TEMBOO

-Ethernet Shield : WIZ550io (W5500 with MAC address)
-IDE : IDE 1.5.7
-Lib. : Ethernet Lib. and Temboo Lib
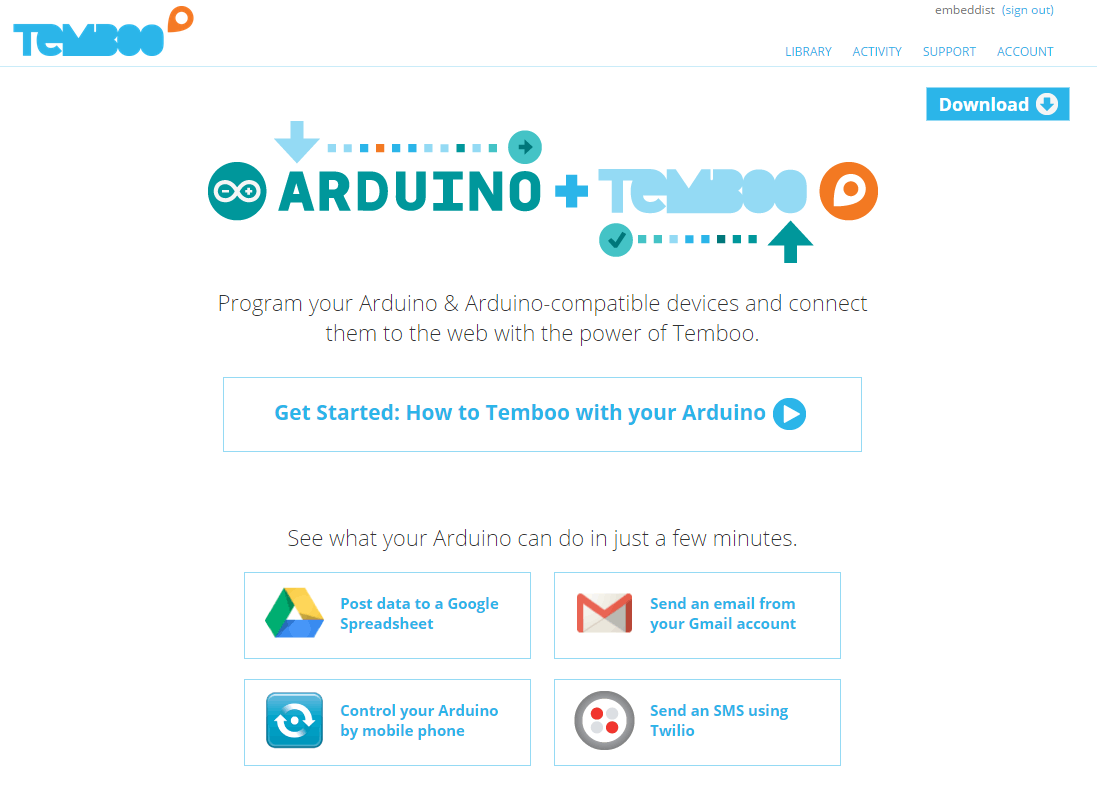
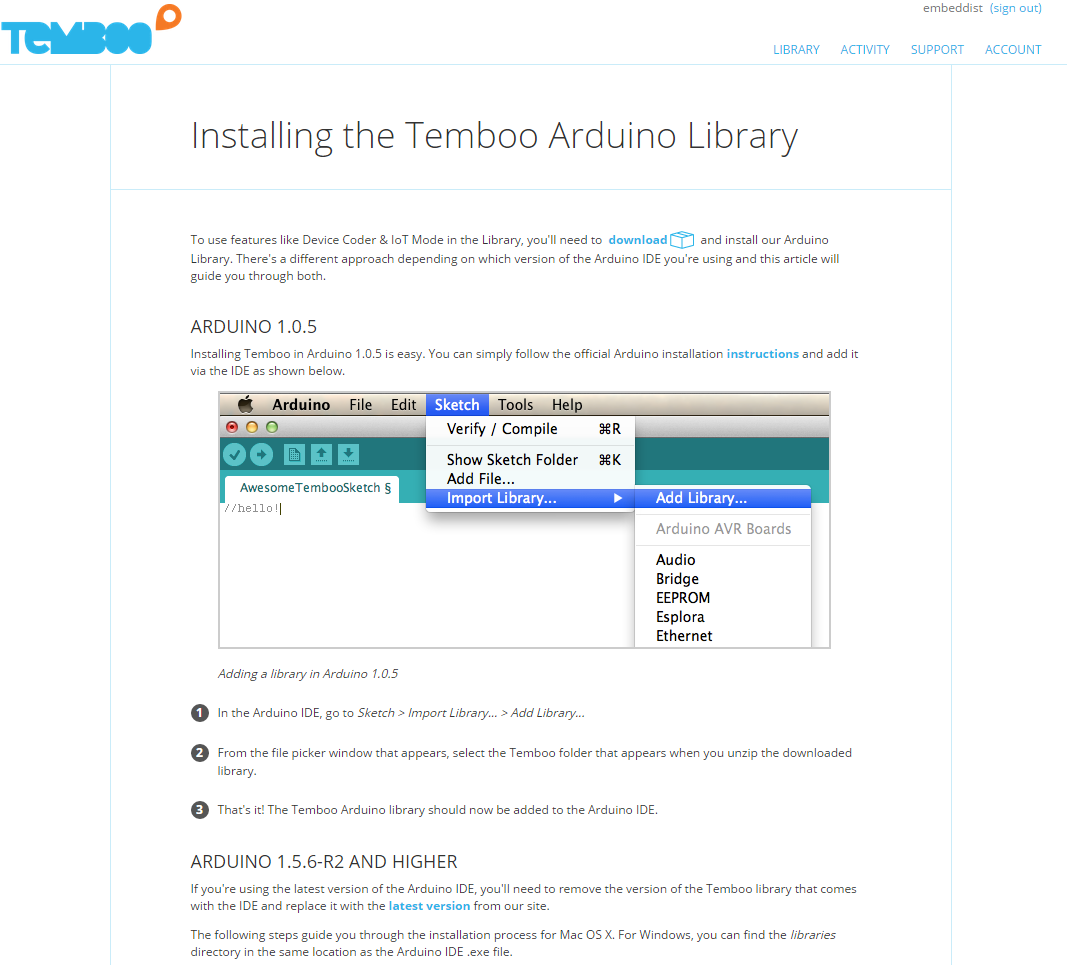
-우측상단의 “IoT Mode”를 “ON”으로 활성화
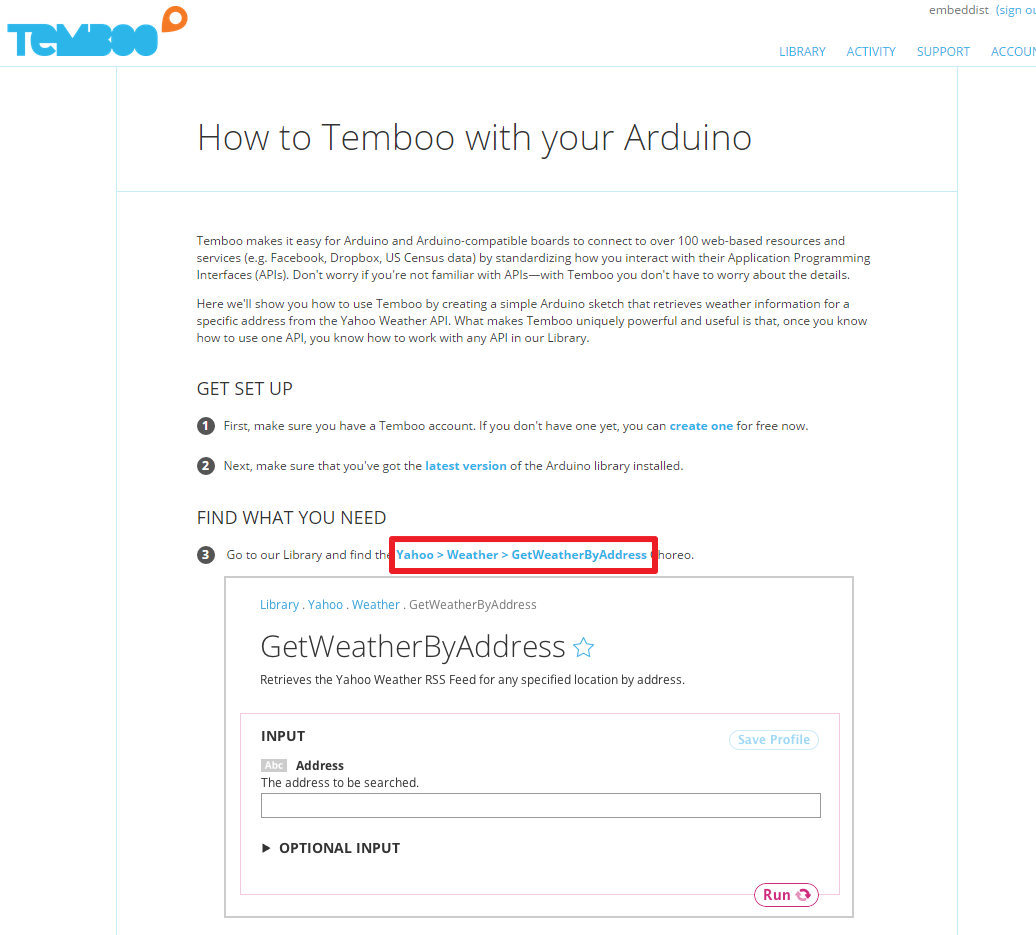
-GetWeatherByAddress란에서 “The address to be searched”밑의 박스에 “Seoul”를 입력 뒤 코드의 생성을 위해 Run을 클릭
-CODE란에 생성된 코드 확인 및 복사

-“C:\Program Files\Arduino\libraries\Temboo\”폴더 밑에 아래와 같이 examples\YahooWeather폴더를 생성한다.
-“C:\Program Files\Arduino\libraries\Temboo\examples\YahooWeather”에 복사한 코드를 폴더명과 같은 이름으로 복사한다.
– 컴파일 후 다운로드
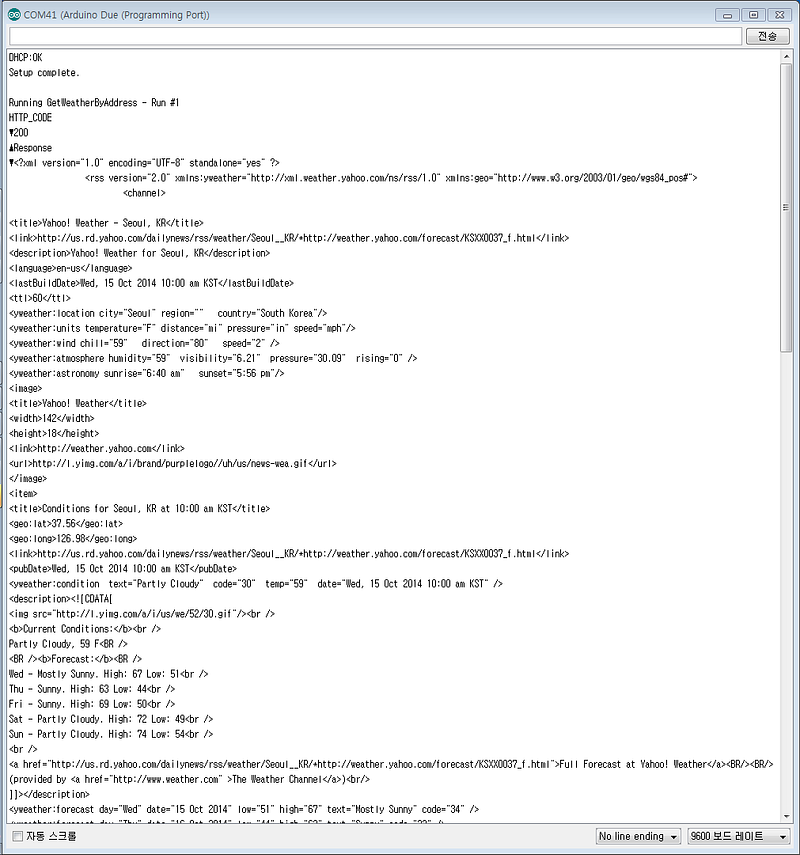
아래와 같이 Seoul의 날씨를 HTTP Get을 통해 해당 웹페이지를 다운받아 Serial로 출력시키는 것을 볼 수 있다.
ioshield-a, ioshield-k

ioshield-a, ioshield-k
