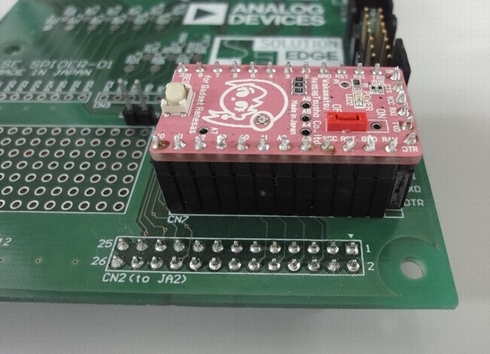
GR-KURUMIのGRは「Gadget Renesas」(がじぇっとるねさす)が提供する小型のリファレンスボードです。超低消費電力マイコンであるRL78が搭載され、ピンク色の基板に女の子の顔がシルク印刷されていてLEDの髪留めがチャーミングです。GR-KURUMIの基板サイズや、外部拡張端子はArduino Pro Mini(アルドゥイーノ・プロ・ミニ)互換で設計されており、その小型なパッケージングから、ホビー用途から、はてはアートへの組み込みマイコンとして幅広く活躍しています。また、開発環境はWebアプリを使ったクラウド・コンパイル環境(Renesas Web Compiler)を実現しており、極めて低コストでマイコン開発を始めることができるようになっているのも幅広いユーザー層の支持を得ています。
WIZ820io provides easy and simple Ethernet connectivity to small platforms like GR-KURUMI (Compatible with Arduino Pro Mini).
WIZnet W5200 ethernet chip is used in WIZ820io.
To use WIZ820io with GR-KURUMI, users need to replace 4 files in the Ethernet library for GR-KURUMI.
Download modified w5100.cpp & w5100.h and files (attached) and overwrite onto the”RLduino78/libraries/Ethernet/utility” folder in your project in e2studio.
Uncomment a below line in the modified w5100.h
This file contains bidirectional Unicode text that may be interpreted or compiled differently than what appears below. To review, open the file in an editor that reveals hidden Unicode characters.
Learn more about bidirectional Unicode characters
Change MAX_SOCK_NUM as 8 on Ethernet.h in RLduino78/libraries.
This file contains bidirectional Unicode text that may be interpreted or compiled differently than what appears below. To review, open the file in an editor that reveals hidden Unicode characters.
Learn more about bidirectional Unicode characters
Set SPI Mode as Mode0 and change the SPI.h in ” RLduino78/libraries/SPI” as below,
This file contains bidirectional Unicode text that may be interpreted or compiled differently than what appears below. To review, open the file in an editor that reveals hidden Unicode characters.
Learn more about bidirectional Unicode characters
Set SPI Clock Divider (@16MHz)and change the in SPI.c in “RLduino78/libraries/SPI ” as below,
This file contains bidirectional Unicode text that may be interpreted or compiled differently than what appears below. To review, open the file in an editor that reveals hidden Unicode characters.
Learn more about bidirectional Unicode characters
Using the W5200 library and evaluate existing Ethernet example.
All other steps are the same as the steps from the Arduino Ethernet Shield. You can find examples in the Arduino IDE, go to Files->Examples->Ethernet, open any example, then copy it to your sketch file (gr_sketch.cpp) and change configuration values properly.
After that, you can check if it is work well. For example, if you choose ‘WebServer’, you should change IP Address first and compile and download it. Then you can access web server page through your web browser of your PC or something.


 PWDN, nINT signals are not used.