WIZ Ethernet Library for Arduino IDE-1.6.4

ARM mbed
Download Arduino IDE-1.6.4

WIZ Ethernet Library

The Ethernet library lets you connect to the Internet or a local network.

  • Supported devices
    W5500 : ioShield, WIZ550io, W5500 Ethernet Shield, Arduino Ethernet Shield 2
    W5200 : W5200 Ethernet Shield, WIZ820io
    W5100 : Arduino Ethernet Shield

  • Software

  • Install WIZ Ethernet library IDE-1.6.4
  • Download all files
  • Overwrite “Ethernet” folder onto the “Arduino\libraries\Ethernet” folder in Arduino sketch.

  • Select device(shield)

  • Uncomment device(shiel) you want to use in $/Ethernet/src/utility/w5100.h
//#define W5100_ETHERNET_SHIELD // Arduino Ethenret Shield and Compatibles ...
//#define W5200_ETHERNET_SHIELD // WIZ820io, W5200 Ethernet Shield
#define W5500_ETHERNET_SHIELD // WIZ550io, ioShield series of WIZnet
  • If WIZ550io used, uncommnet “#define WIZ550io_WITH_MACAADDRESS” in $/Ethernet/src/utility/w5100.h
#if defined(W5500_ETHERNET_SHIELD)
//#define WIZ550io_WITH_MACADDRESS // Use assigned MAC address of WIZ550io
#include "w5500.h"
#endif
  • Using the WIZ Ethernet library and evaluate existing Ethernet example.
    All other steps are the same as the steps from the Arduino Ethernet Shield. You can use examples in ./Ethernet/examples folder for the Arduino IDE 1.6.4, go to Files->Examples->Ethernet, open any example, then copy it to your sketch file and change configuration values properly.
    After that, you can check if it is work well. For example, if you choose ‘WebServer’, you should change IP Address first and compile and download it. Then you can access web server page through your web browser of your PC or something.

What is new ?

  • Added new functions
  • sockStatus(SOCKET s) = readSnSR(SOCKET s)
uint8_t socketStatus(SOCKET s)
{
SPI.beginTransaction(SPI_ETHERNET_SETTINGS);
uint8_t status = W5100.readSnSR(s);
SPI.endTransaction();
return status;
}
  • reavAvalable(SOCKET s) = getRxReceiveSize(SOCKET s)
int16_t recvAvailable(SOCKET s)
{
SPI.beginTransaction(SPI_ETHERNET_SETTINGS);
int16_t ret = W5100.getRXReceivedSize(s);
SPI.endTransaction();
return ret;
}
  • Added SPI Transaction APIs
    To solve conflicts that sometimes occur between multiple SPI devices when using SPI from interrupts and/or different SPI settings, SPI Transcation APIs use between between read and write SPI functions.
SPI.beginTransaction(SPI_ETHERNET_SETTINGS);
W5100.setIPAddress(_dhcp->getLocalIp().raw_address());
W5100.setGatewayIp(_dhcp->getGatewayIp().raw_address());
W5100.setSubnetMask(_dhcp->getSubnetMask().raw_address());
SPI.endTransaction();
  • Removed Twitter.cpp / Twitter.h

Code on Github

Version History

  • Initial Release : 21 May. 2015
ARDUINO with TEMBOO

-www.temboo.com
템부(Temboo)는 기업들은 API 관리 전문업체 중 하나이다. 보안 API 접속 서비스는 물론이고 일부는 API 호환 서비스를, 또 일부는 클라우드 기반의 API 접근경로를 제공한다.
 
-Program hardware for the Internet of Things
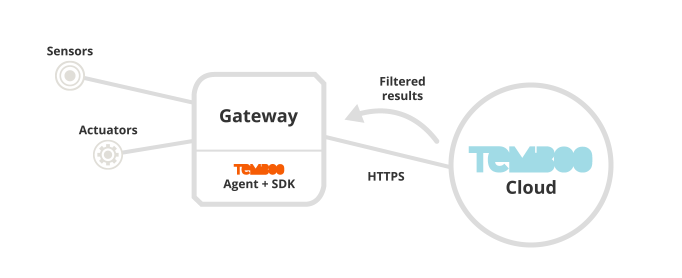
위의 그림처럼 IoT의 hardware 들을 위한 API (Agent+SDK), Cloud service까지 그 영역을 넓혀가는 중이며 Open Hardware의 선두주가 Arduino와 LaunchPad를 중심으로한 Texas Instruments사의 Platform을 현재 지원중이다.
글보단 한편의 동영상으로 Temboo를 이해해 보자
IoT Hardware을 위한 API를 살펴보면서 그 막강한 기능을 체험해보자.
Yahoo Weather를 Temboo와 Arduino를 이용한다.
*Preparation materials
-Arduino board : Arduino Due
-Ethernet Shield : WIZ550io (W5500 with MAC address)
-IDE : IDE 1.5.7
-Lib. : Ethernet Lib. and Temboo Lib
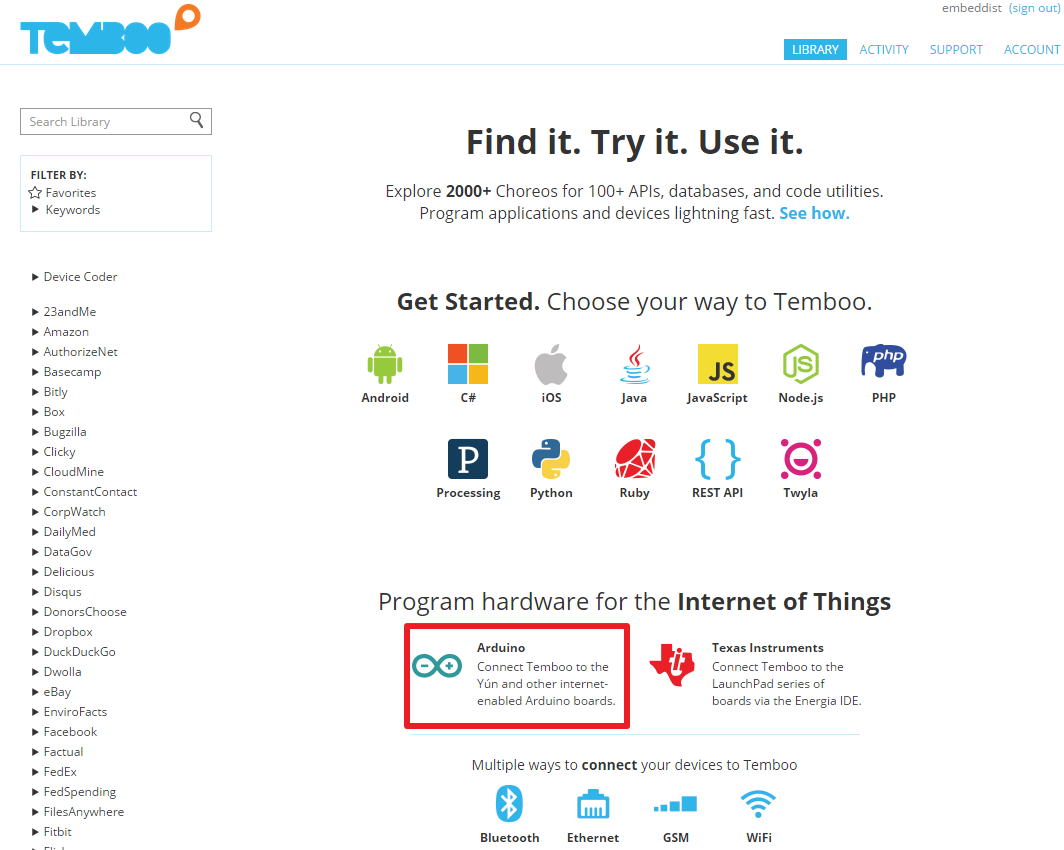
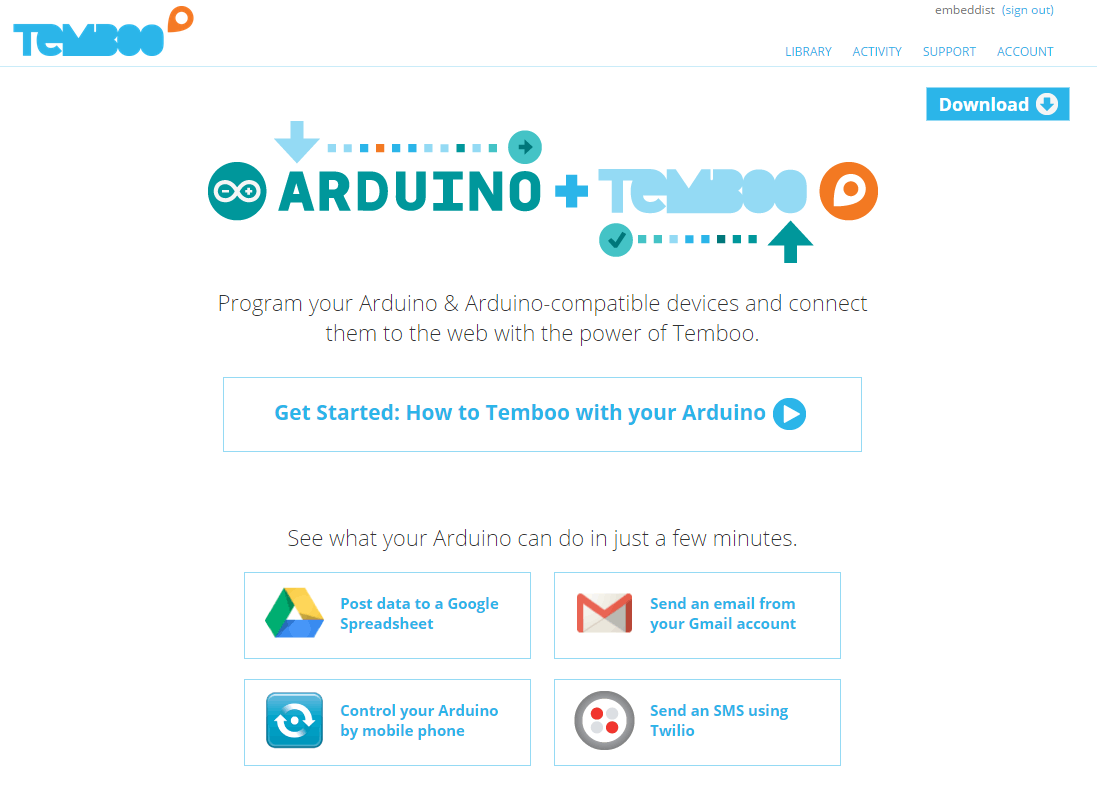
1. 먼저 Temboo에 로그인 한뒤 아래의 페이지에서 “Arudino” 클릭 
-Select Arduino on Program hardware for the Internet of Things
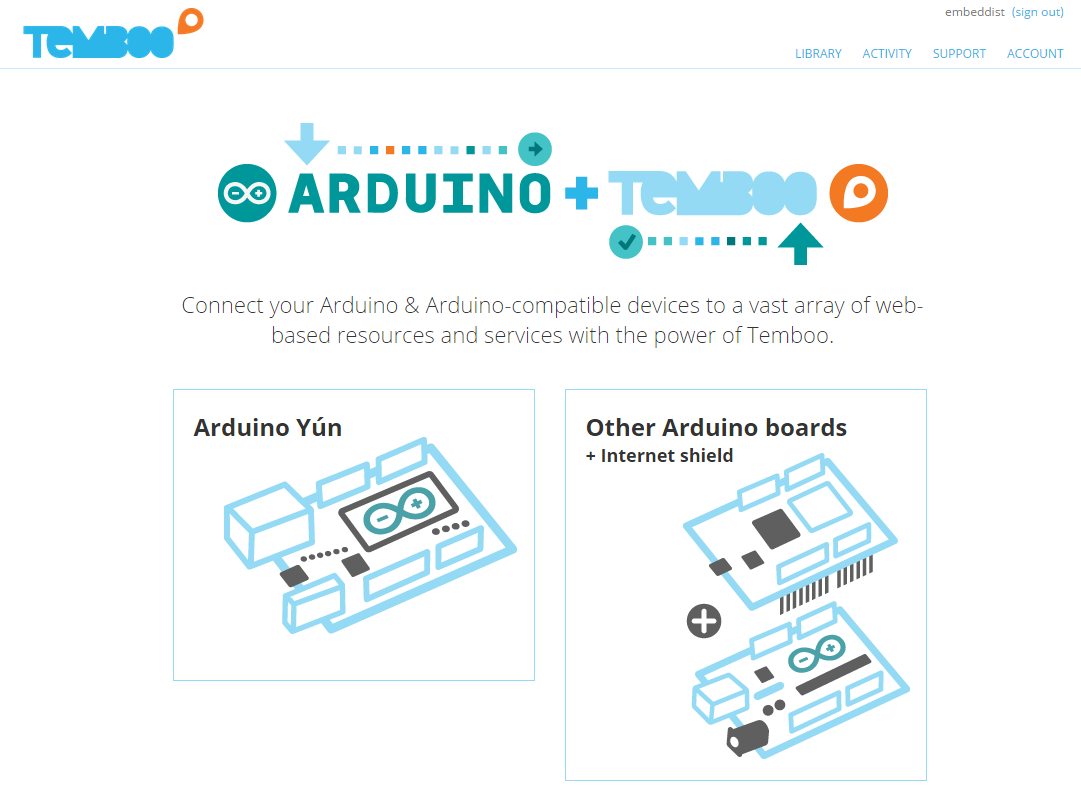
2. ARDUINO+TEMBOO에서 자신이 사용하려는 Hardware선택 
– Select Device: Arduino Yun or Other Arduino Boards + Internet Shield
3. 이제 Temboo Arduino Library의 설치를 위해 아래의 그림에서 우측상단의 “Download”클릭 
– ARDUINO+TEMBOO
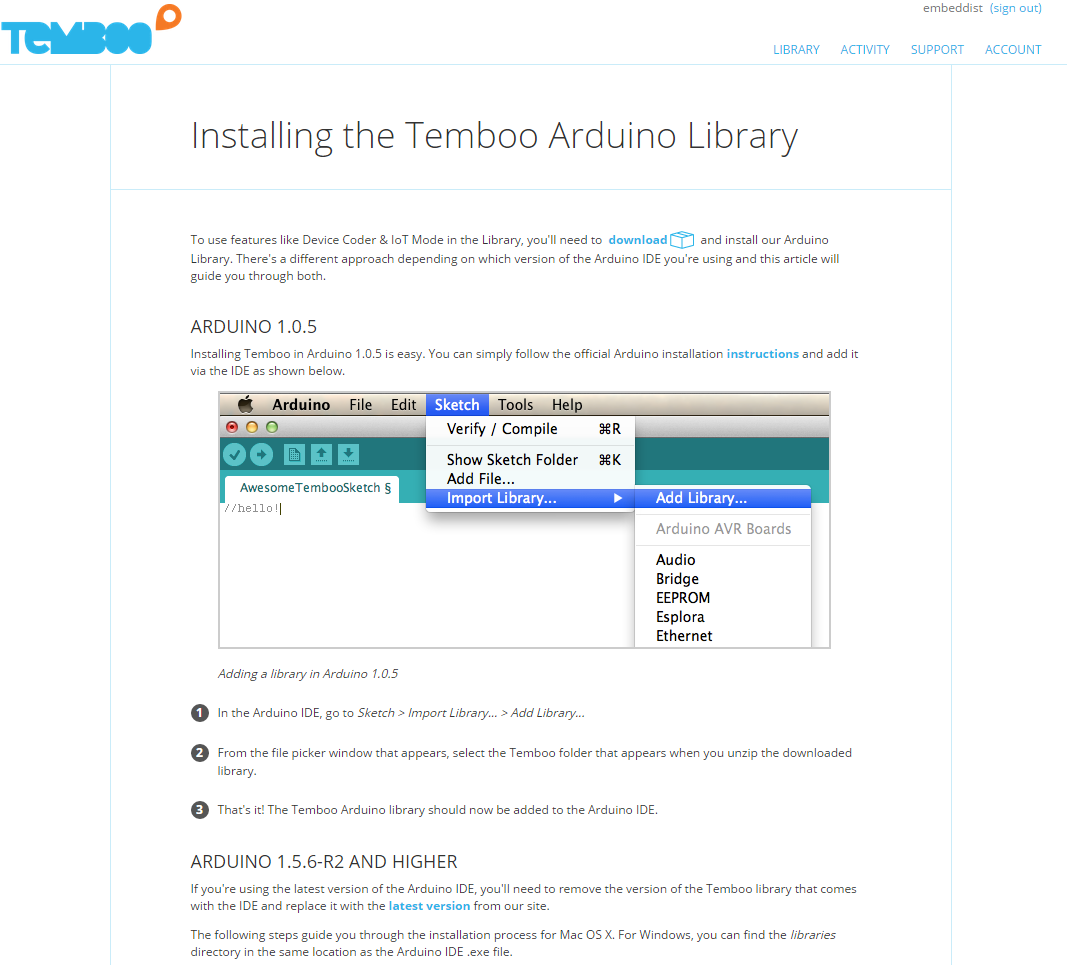
4. Installing에 관한 대용은 아래의 사이트를 참고하며 간단하게 download된 Temboo Arduino Library를 “C:\Program Files\Arduino\libraries” 에 압축을 푼다. IDE1.5.7기준! 
– Installing the Temboo Arduino Library
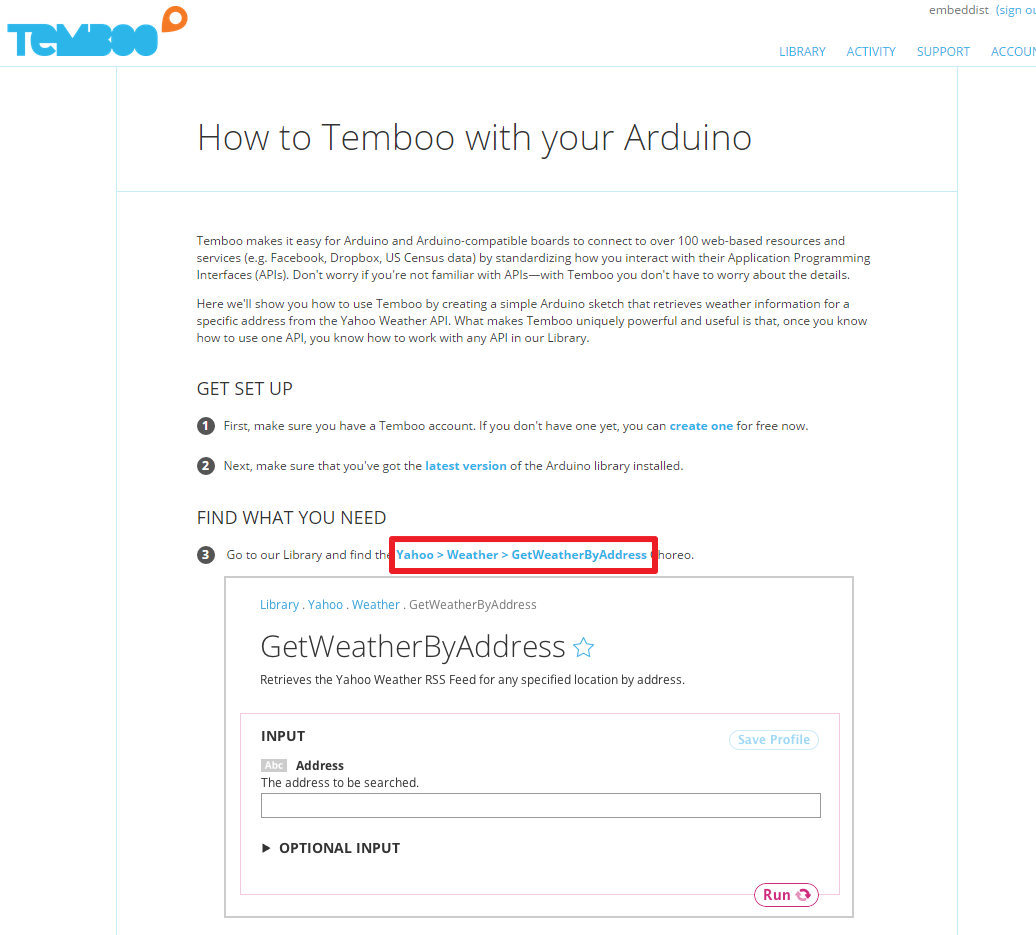
5. 이제 예제를 선택한다 여기서는 GetWeatherByAddress! 
– Select GetWeatherByAddress with Temboo Arduino Library
6. 이제 몇가지 설정으로 GetWeatherByAddress.ino를 생성 시키자
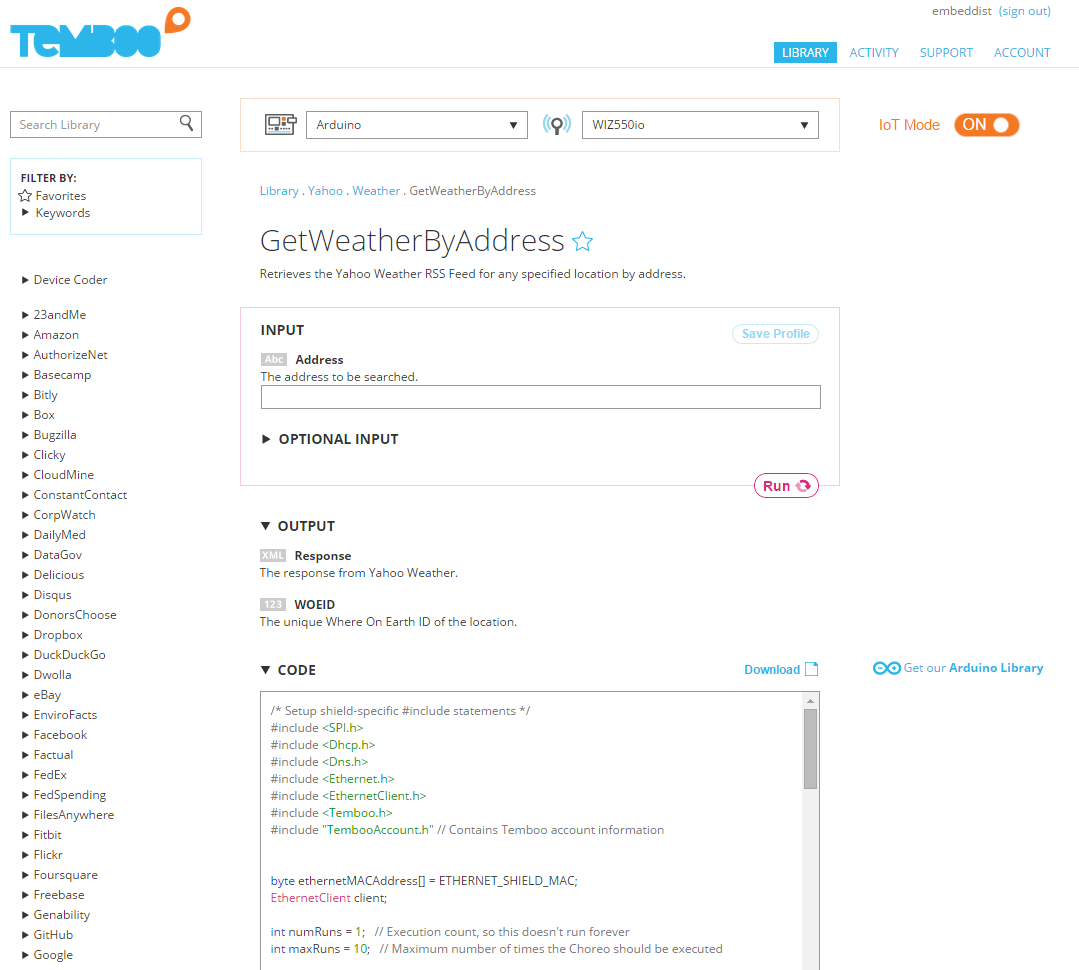
-우측상단의 “IoT Mode”를 “ON”으로 활성화
-GetWeatherByAddress란에서 “The address to be searched”밑의 박스에 “Seoul”를 입력 뒤 코드의 생성을 위해 Run을 클릭
-CODE란에 생성된 코드 확인 및 복사 
– Configuration and Generation of CODE
7. IDE에서 Compile 및 다운로드
-“C:\Program Files\Arduino\libraries\Temboo\”폴더 밑에 아래와 같이 examples\YahooWeather폴더를 생성한다.
-“C:\Program Files\Arduino\libraries\Temboo\examples\YahooWeather”에 복사한 코드를 폴더명과 같은 이름으로 복사한다.
– 컴파일 후 다운로드
8. Demo: Serial Monitoring
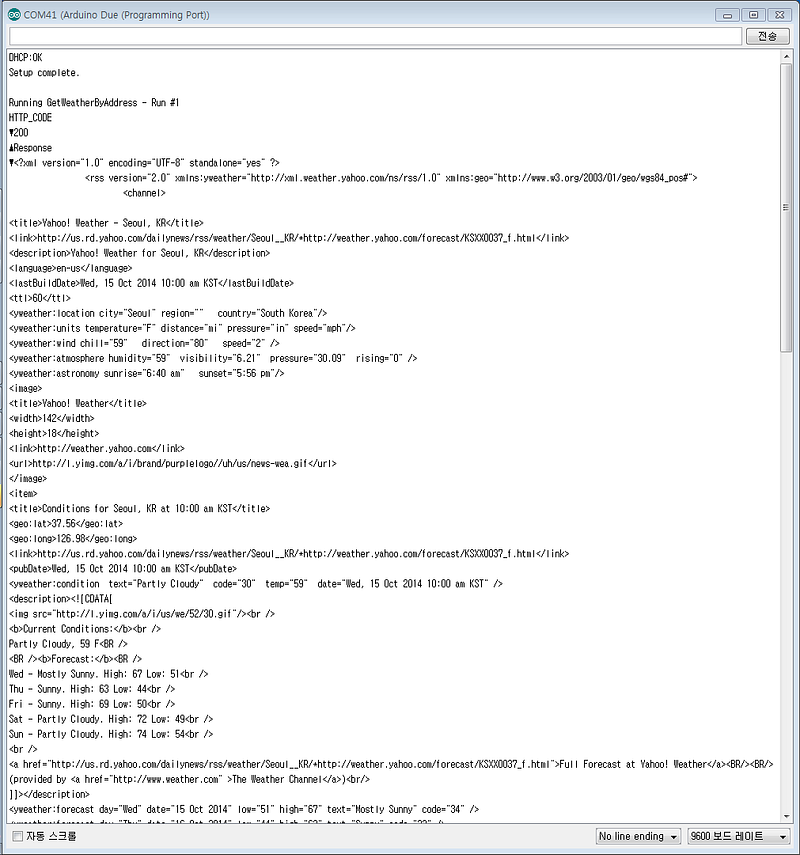
아래와 같이 Seoul의 날씨를 HTTP Get을 통해 해당 웹페이지를 다운받아 Serial로 출력시키는 것을 볼 수 있다.
-Get Seoul Weather http message on Serial Monitoring

Web Service (Yaler) with Arduino (korean)

Web Service (Yaler) with Arduino

Yaler:

최근 많은 Cloud Service들이 Client들이 Device에 접속하기 위해 Device에 바로 접속하는 것이 아니고 이미 등록되어 있는 Server에 접속하여 Device를 제어 및 모니터링 하는 Service들이 다양하게 존재한다. 이러한 경우 Server는 보안 및 네트워크 구성이 다양하며, Device의 경우 Light weight한 구현을 할 수 있고, Clinet도 물론 편리한 UI, Visulaztion등의 이유로 많은 장점을 갖는다.

이번 Posting에서는 Cloud service중 Yaler를 통해 Cloud Service를 경험해보자. ㅋㅋ

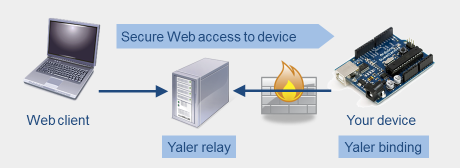
Yaler는 embedded system의 접근을 위해 relay infrastructure을 제공한다. relay infrastructure는 control, manage, secure등을 보장한다.

아리의 두그림은 yaler.net에서 relay infrastructure를 설명하는 자료이다. 위의 그림(a)은 Device를 NAT/Farewell 하위에 네트워크를 구성한 경우이며 이때에는 Web client가 Device에 접근하기 위해 Device의 정보이외에도 Network상에서 보안관련 정보나 NAT의 설정등의 정보 및 설정이필요하다. IoT시대에 많은 Device등을 고려한다면 Device정보을 비롯한 접근을 위한 정보까지 관리하는 것은 그렇게 쉽지는 않을 것으로 생각되며Yaler는 그림(b)의 relay infrastructure을 구성하여 Yaler relay라고 불리는 Server를 통해 Device를 접속할 수 있다. Device를 Yaler relay에 binding하여 Device에 대응되는 Relay Host, Relay Domain, Secret Key를 할당받게된다. Web Client 는 이를 이용하여 Device가 아닌 Yaler relay에 접속하게 되며 Yaler relay는 Binding 정보를 이용하여 Device에 접속하는 구조이다.

(a) Firewall, NAT or mobile router prevents access from yaler.net
(b) Relay provides addressability and accessibility from yaler.net

아래의 Yaler이해하기 자료의 slideshare의 자료에서는 Publish HTTP라는 단어로 좀 더 추체적으로 Yaler에 대해 설명되어 있습니다.

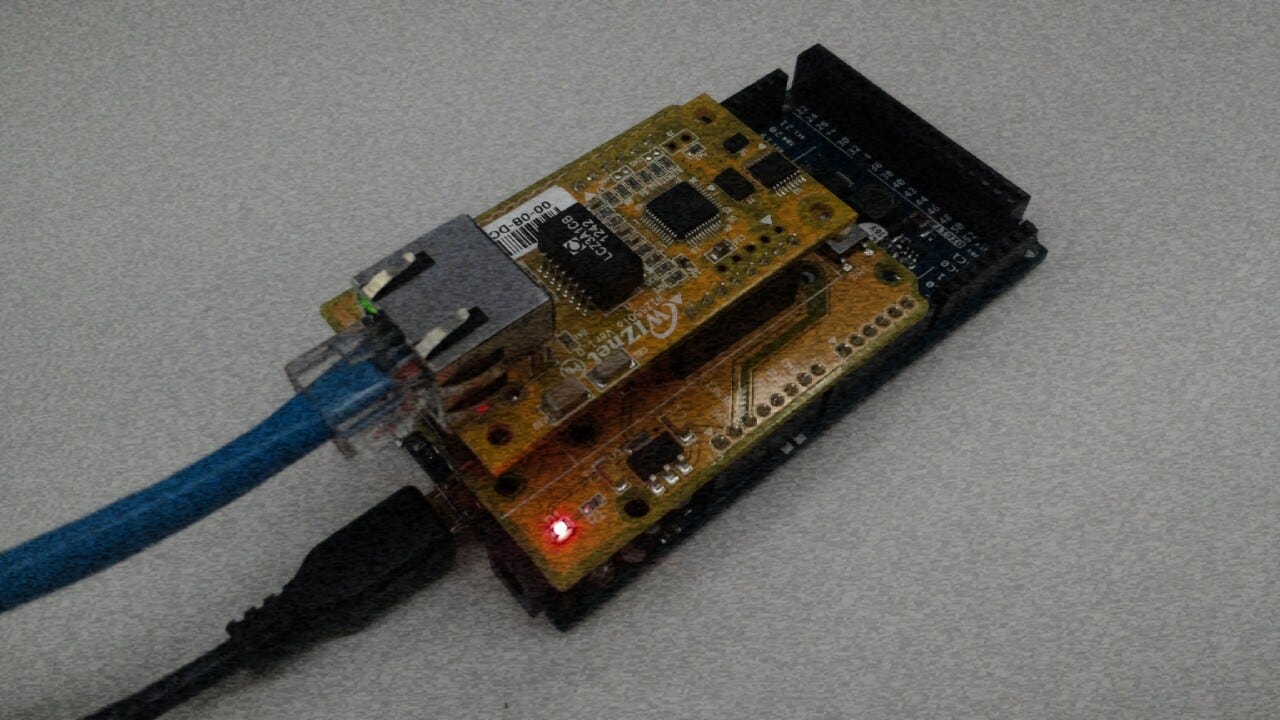
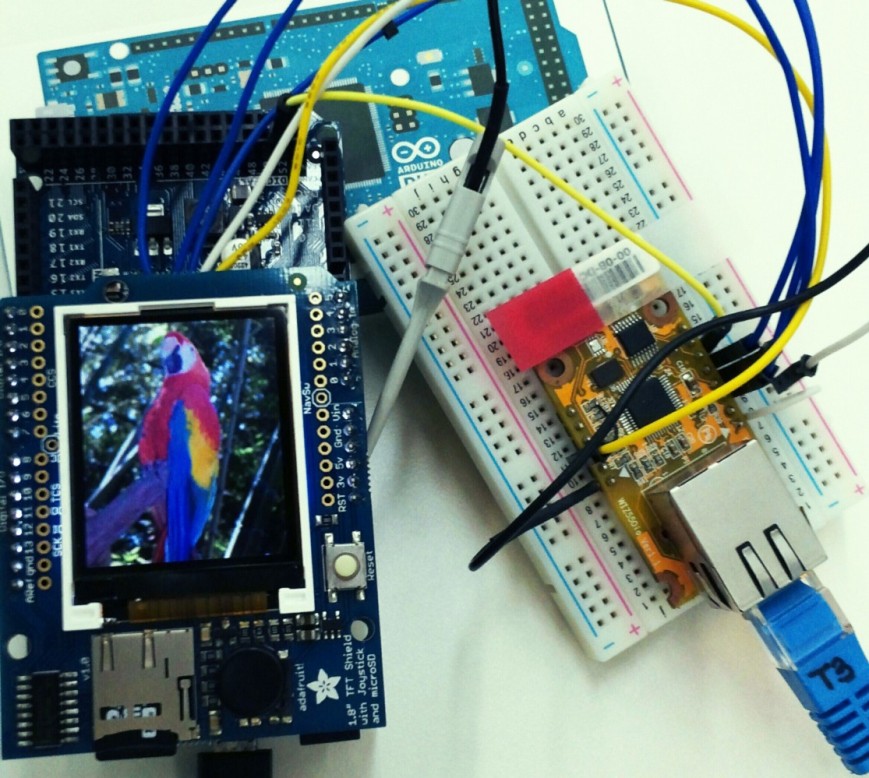
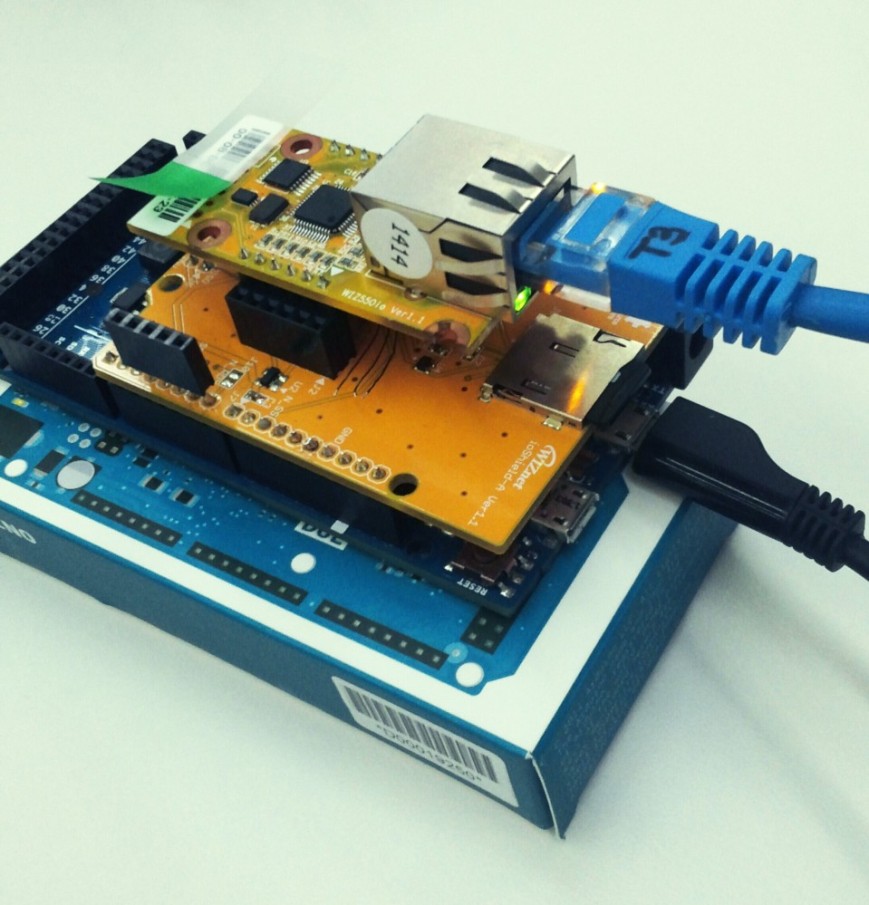
Arduino DUE with WIZ550io

Do Yaler:

Yaler를 체험하기 위해 필요한 Hardware는 Arduino Board와 Ethernet Shield이다. 그리고 Yaler relay는 yaler.net를 사용하였다

Make account on yaler.net:
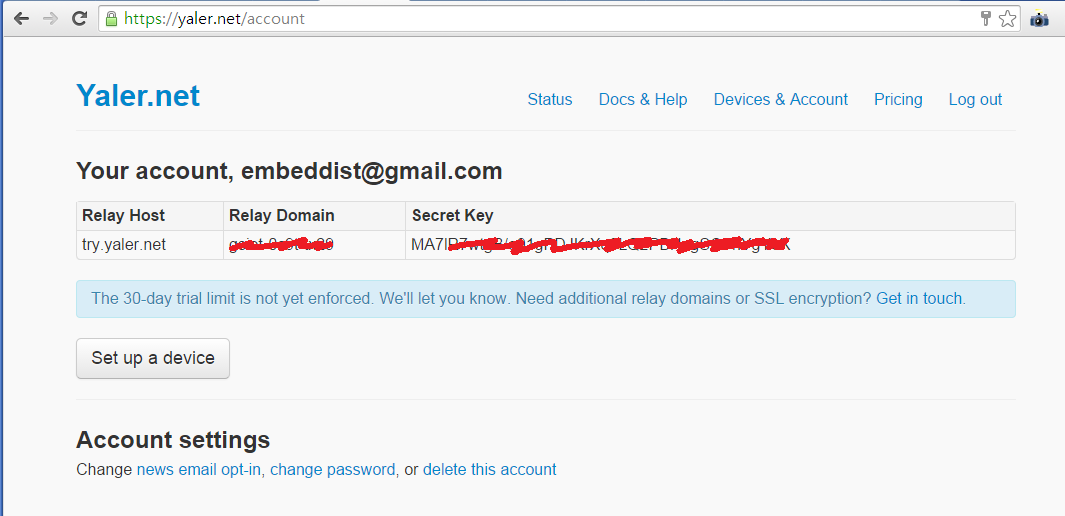
무료계정은 한달간 이용할 수 있다. 계정을 만드는 동시에 아래와 같이 Relay Host, Relay Domain, Secret Key을 할당 받는다.

account for yaler.net

Setting Device :
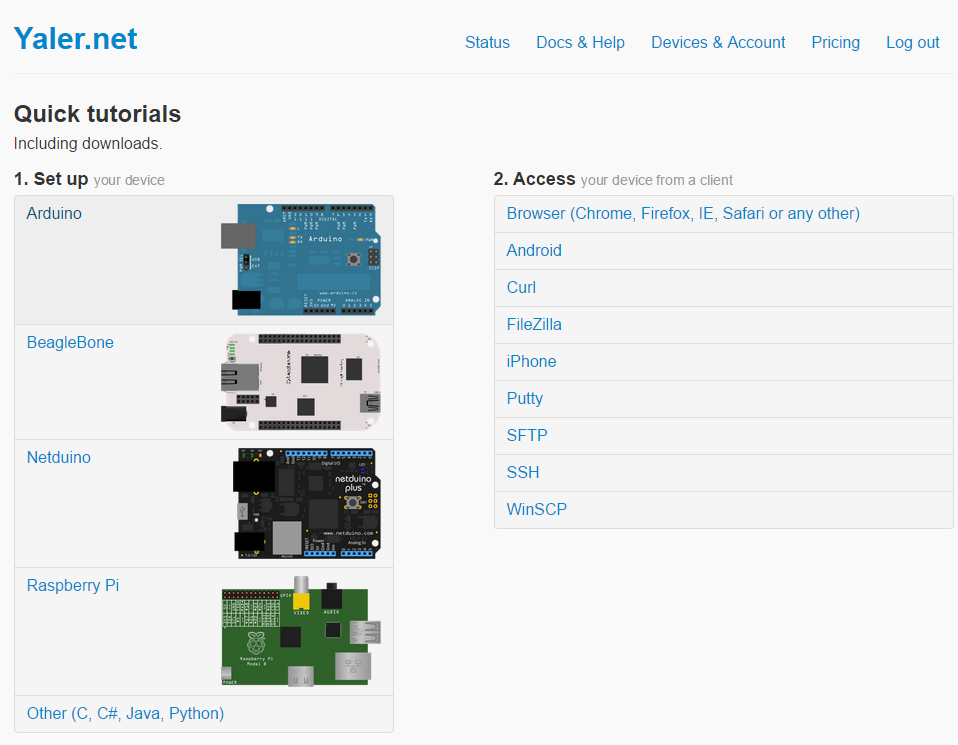
위의 그림에서 “set up a device” 거침없이 클릭!
아래서 Arduino선택!

Yaler.net Lib.:
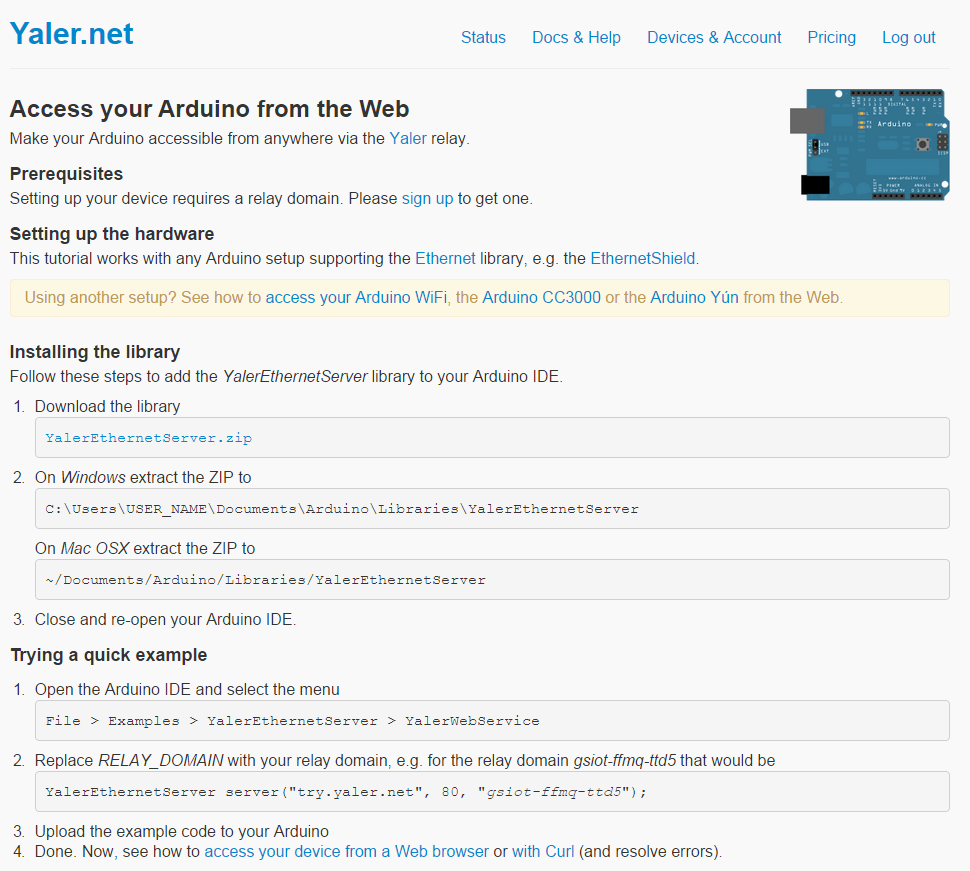
위의 단계에서 Arduino를 클릭하면 아래와 같은 페이지가 나온다. 하기의 페이지에 Yaler Lib의 설치 예제까지 나와 있다. 일단 “YalerEthernetServer.zip”를 다운받고 IDE.1.5.7인경우 “C:\Program Files\Arduino\libraries”밑에 압축을 푼다. 그럼 라이브러리 준비 끝.

Yaler Scketch :

  • IDE: IDE.1.5.7,
  • Lib : YalerEthernetServer, WIZnet Ethernet Lib. [Lib설치 설명]
  • Sketch : WebService.ino

//WebService.ino
// Copyright (c) 2014, Yaler GmbH, Switzerland
// All rights reserved

#include <SPI.h>

#include <Ethernet.h>
#include <YalerEthernetServer.h>

// Enter a MAC address for your controller below.
// Some Ethernet shields have a MAC address printed on a sticker
// Local EthernetServer at http://LOCAL_IP/
// (e.g.http://192.168.0.7/)
#if defined(WIZ550io_WITH_MACADDRESS) // Use assigned MAC address of WIZ550io
; //WIZ550io은 MAC 내장이기 때문에 이부분이 필요없다.
#else
byte mac[] = {0xDE, 0xAD, 0xBE, 0xEF, 0xFE, 0xED};
#endif

// Get a free relay domain at http://yaler.net/ to replace RELAY_DOMAIN below
// Public YalerEthernetServer is accessible athttp://RELAY_DOMAIN.yaler.net/
YalerEthernetServer server(“try.yaler.net”, 80, “RELAY_DOMAIN”);// REALY_DOMAIN 대신 할당받는 Relay Domain을 입력한다.

void setup() { Serial.begin(9600); Serial.println(“Aquiring IP address…”);

#if defined(WIZ550io_WITH_MACADDRESS) // Use assigned MAC address of WIZ550io

    if (Ethernet.begin() == 0) {

#else if (Ethernet.begin(mac) == 0) {

#endif
Serial.println(“DHCP failed.”); }

    else {
Serial.println(Ethernet.localIP()); server.begin();
}
}

void sendResponse(EthernetClient client) {
client.print(“HTTP/1.1 200 OK\r\n”);
client.print(“Connection: close\r\n”);
client.print(“Content-Length: 5\r\n”); //Hello는 5자라서 Content-Length는 5!
client.print(“\r\n”);
client.print(“Hello”); //이부분이 Http Client 즉 Web brower에 표시되는 부분 위의 Content-Length에 설정된 Length만큼 출력되니 이부분 참고 하여 msg 부분을 수정한다
}

void loop() {
EthernetClient client = server.available();
if (client && client.connected()) {
client.find(“\r\n\r\n”); // Consume incoming request sendResponse(client);
delay(1); // Give the Web browser time to receive the data
client.stop();
}
}

Demo:
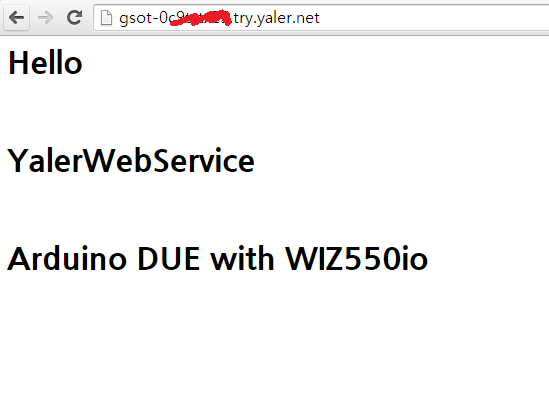
Web Client (Chrome)에 URL을 Relay Domain.try.yaler.net형식으로 입력한뒤 Device에 접속하여 message을 받은 모습

Access Device with Web Client (Chrome)

Ref. Yaler:
— Simple, open and scalable relay infrastructure URL:http://www.slideshare.net/yaler/yaler-wot-v20100325b
— yaler.nt : https://yaler.net

WIZ Ethernet Library for Arduino IDE 1.5.7

WIZ_Ethernet_Lib_IDE1.5.7.git

The Ethernet library lets you connect to the Internet or a local network.

Supported devices

  • ioShield, WIZ550io (used in W5500)
  • W5200 Ethernet Shield, WIZ820io (used in W5200)
  • Ethernet Shield (used in W5100)

Hardware

Software

Install WIZ Ethernet library

Download all files and overwrite onto the”Arduino\libraries\Ethernet” folder in your project in sketch.
– Ethernet folder has two folers, examples and src folers.

Select device(shield)

Uncomment device(shiel) you want to use.

//ArduinolibrariesEthernetutilityw5100.h
#ifndef W5100_H_INCLUDED
#define W5100_H_INCLUDED

#include <avr/pgmspace.h>
#include

typedef uint8_t SOCKET;
//#define W5100_ETHERNET_SHIELD
//#define W5200_ETHERNET_SHIELD
#define W5500_ETHERNET_SHIELD

Using the WIZ Ethernet library and evaluate existing Ethernet example.

All other steps are the same as the steps from the Arduino Ethernet Shield.
You can use examples in ./Ethernet/examples folder for the Arduino IDE 1.5.7, go to Files->Examples->Ethernet, open any example, then copy it to your sketch file and change configuration values properly.
After that, you can check if it is work well. For example, if you choose ‘WebServer’, you should change IP Address first and compile and download it. Then you can access web server page through your web browser of your PC or something.

Revision History

Initial Release : 15 Jul. 2014